

Introduction
In this tutorial, we will implement how to enable Keycloak 2FA with TOTP and generate a QR Code via the REST API. The goal is to configure the 2FA QR Code in our custom UI using the REST API, eliminating the need for the Keycloak page to set up OTP Credentials. So, the User can set up 2FA inside your custom UI settings on the client side.
Tutorial
In order to setup user 2FA, first of all we need keycloak running. In this section I will use docker to run a keycloak using docker compose. This is a sample keycloak docker compose with version 26.
services:
  keycloak:
    image: quay.io/keycloak/keycloak:26.0.1
    container_name: keycloak
    environment:
      KEYCLOAK_ADMIN: admin
      KEYCLOAK_ADMIN_PASSWORD: admin
      KC_DB: postgres
      KC_DB_URL: jdbc:postgresql://postgres:5432/keycloak
      KC_DB_USERNAME: keycloak
      KC_DB_PASSWORD: keycloak
      KC_HOSTNAME: localhost
      KC_HOSTNAME_PORT: 8080
      KC_HOSTNAME_STRICT_HTTPS: false
      KC_HOSTNAME_STRICT_BACKCHANNEL: false
      KC_HTTP_ENABLED: true
      KC_METRICS_ENABLED: true
      KC_HEALTH_ENABLED: true
    command: start-dev
    volumes:
      - keycloak_data:/opt/keycloak/data
      - ./themes:/opt/keycloak/themes
      - ./providers:/opt/keycloak/providers
    ports:
      - "8080:8080"
    depends_on:
      - postgres
    networks:
      - keycloak-network

  postgres:
    image: postgres:15
    container_name: keycloak-postgres
    environment:
      POSTGRES_DB: keycloak
      POSTGRES_USER: keycloak
      POSTGRES_PASSWORD: keycloak
    volumes:
      - postgres_data:/var/lib/postgresql/data
    networks:
      - keycloak-network

volumes:
  keycloak_data:
    driver: local
  postgres_data:
    driver: local

networks:
  keycloak-network:
driver: bridgeYou can create a folder and put the Docker Compose above inside. after that to run the Docker Compose file, we can command syntax with: docker compose up -d
After keycloak already running, let's configure the Rest API 2FA QR Code for Keycloak.
1. First, because keycloak by default doesn't have a rest API for Generate QR Code. We can use a plugin REST API that has already been made by contributors.
2. To download the plugin, please visit this github repository: https://github.com/arisusantolie/keycloak-totp-api-provider then simply download a plugin jar file in the release menu.

3. After download, put the jar file into folder providers in keycloak. Then simply restart the keycloak container in Docker using: docker compose restart

4. After restart the keycloak, login into keycloak console then create a new realm or use existing realm that u already have. in my case I create a new realm with name : my-realm.
5. As we mention above, we will using custom plugin rest API for generate qr code, the API must be secure access, so to access the API we need a service account in our keycloak realm. Please follow this step carefully to setup a service account in keycloak.
- Create a realm role, in Realm Roles menu. then add new one with name : manage-totp
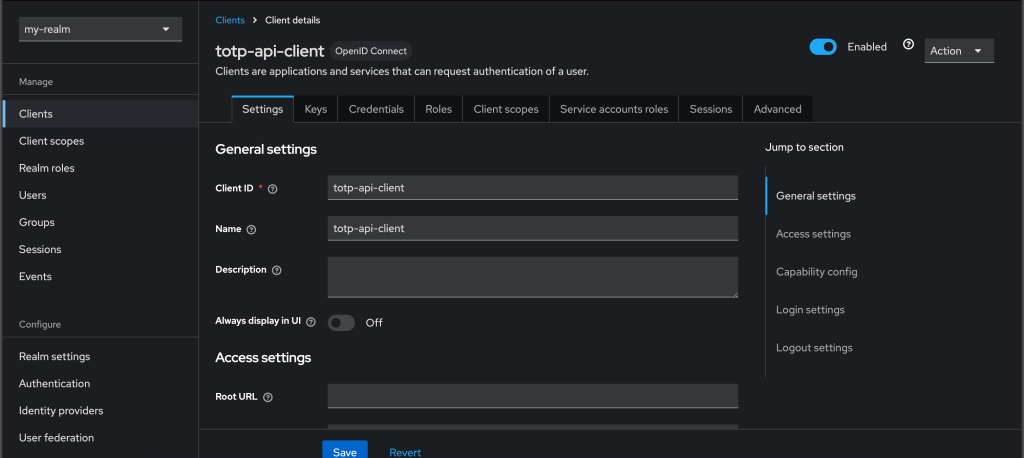
- then, go to Clients menu. next create a new client with client id for example : totp-api-client
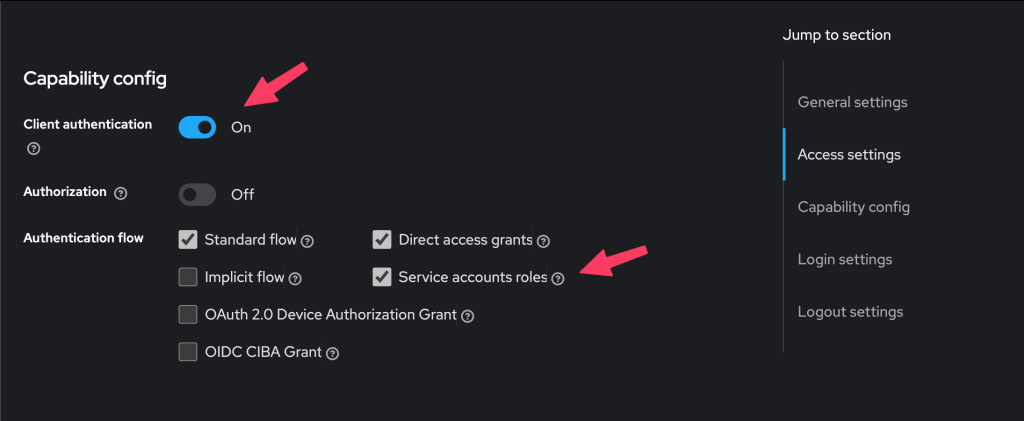
- Enable Client authentication to ON, then tick yes the Service accounts role.
- Then next and create the client.
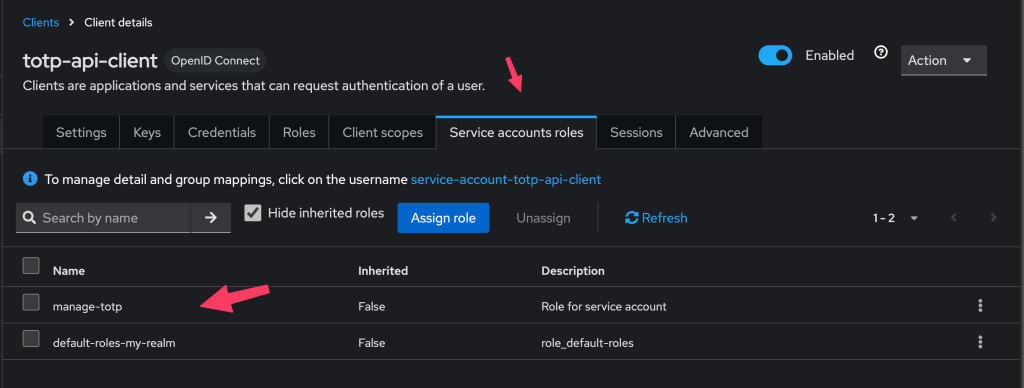
- Go to Service account roles menu in totp-api-client that already create, then assign a realm role manage-totp
After successfully creating a service account, let's try to use the REST API TOTP QR Code in Keycloak to generate and set up the 2FA for the user.
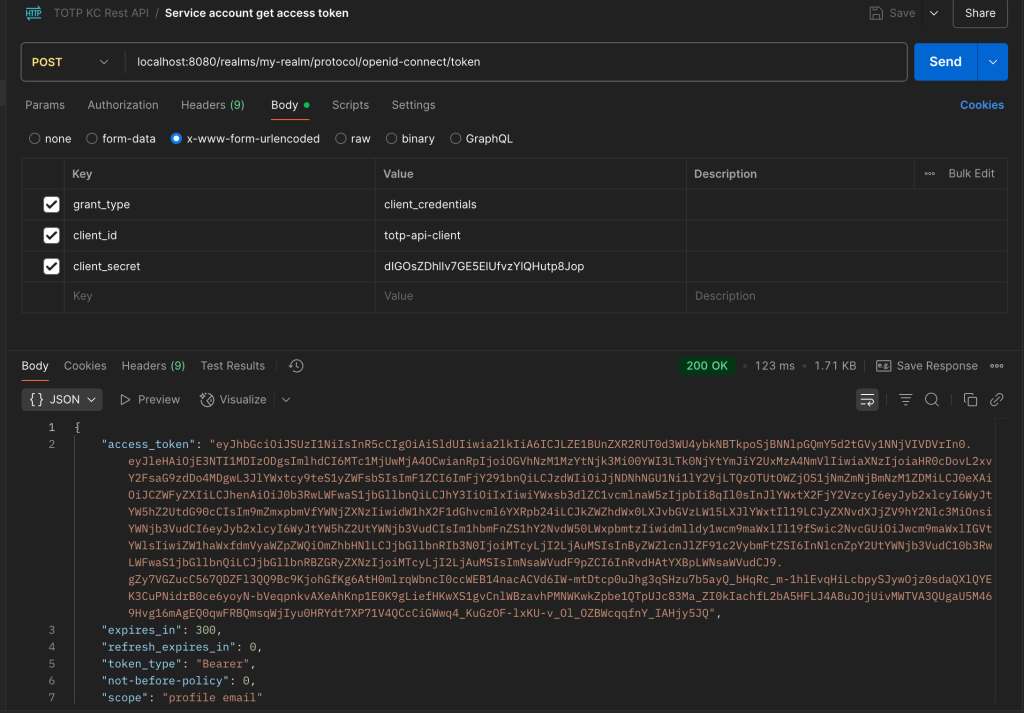
1. First we need to get access token from service account, to get the access token we can use direct grant access that keycloak already provided. this is below example for curl to get the access token for service account.
curl -X POST \
  "https://<KEYCLOAK-HOST>/realms/<REALM>/protocol/openid-connect/token" \
  -H "Content-Type: application/x-www-form-urlencoded" \
  -d "grant_type=client_credentials" \
  -d "client_id=totp-api-client" \
-d "client_secret=<CLIENT_SECRET>"Note: The client secret value can be obtained from the Credentials menu client that was already created before.
2. Then to generate a qr code for user, so user can scan or input the key in authenticator app, we can obtained from REST API below :
curl --location 'localhost:8080/realms/my-realm/totp-api/4c79cc44-df4a-4edd-a26b-9361381add3c/generate' \
--header 'Authorization: Bearer eyJhbGciOiJSUzI1NiIsInR5cCIgOiAi.....'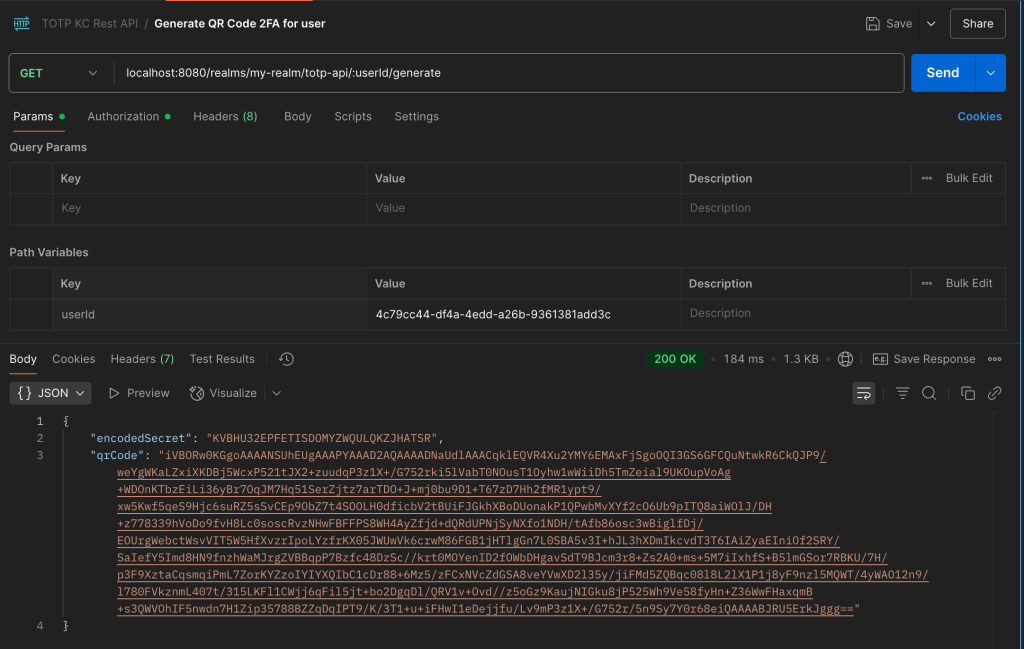
Then we can copy the Base64 QR Code then convert it into an image so user can scan the QR. or directly using a encodeSecret to input manually in Authenticator App.
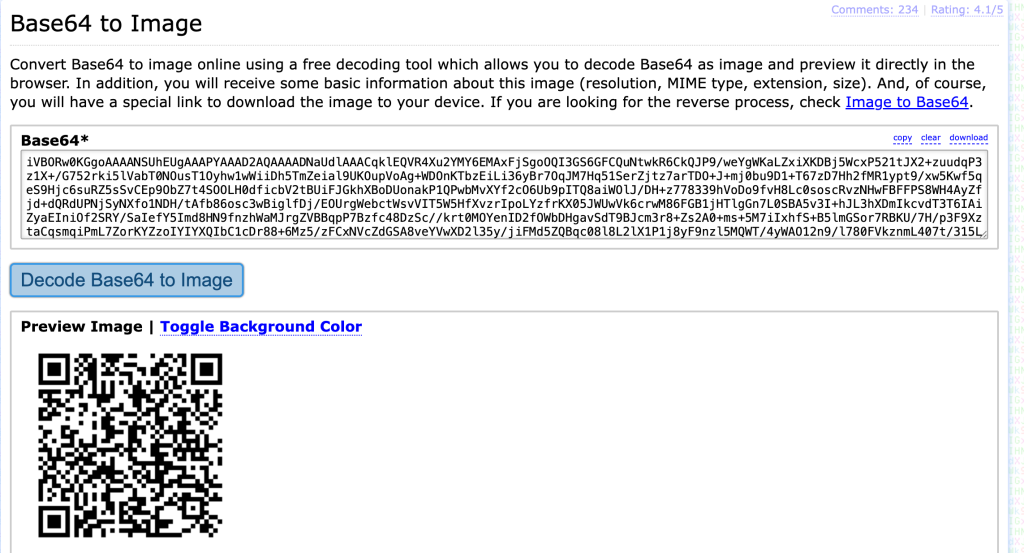
3. Then scan the qr code to get the TOTP code in Google Authenticator, FreeOTP, or Microsoft Authenticator.
4. To register totp into user credential we can used this REST API below.
curl --location 'localhost:8080/realms/my-realm/totp-api/4c79cc44-df4a-4edd-a26b-9361381add3c/register' \
--header 'Content-Type: application/json' \
--header 'Authorization: Bearer eyJhbGciOiJSUzI1NiIsInR5cCIgOiA....' \
--data '{
  "deviceName": "MyDevice",
  "encodedSecret": "KVBHU32EPFETISDOMYZWQULQKZJHATSR",
  "initialCode": "227349",
  "overwrite": true
}'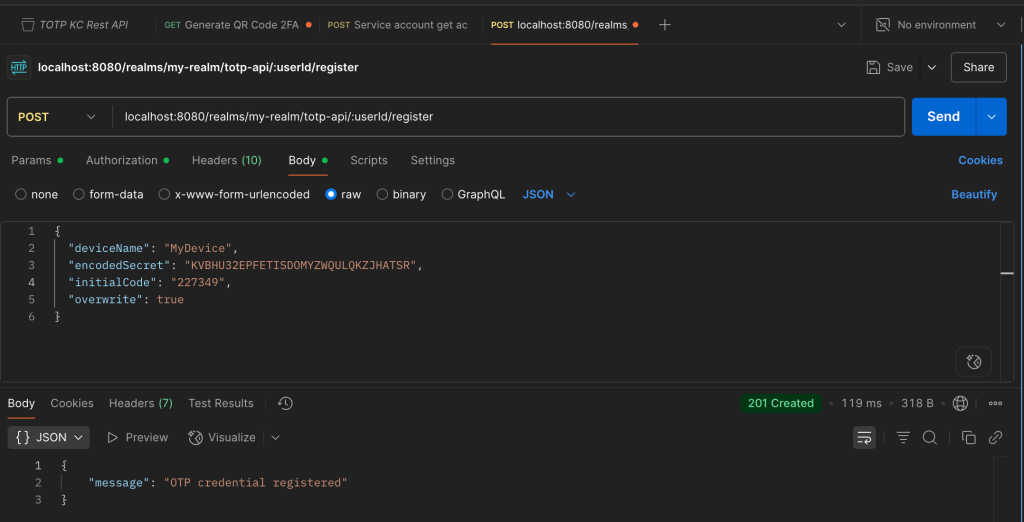
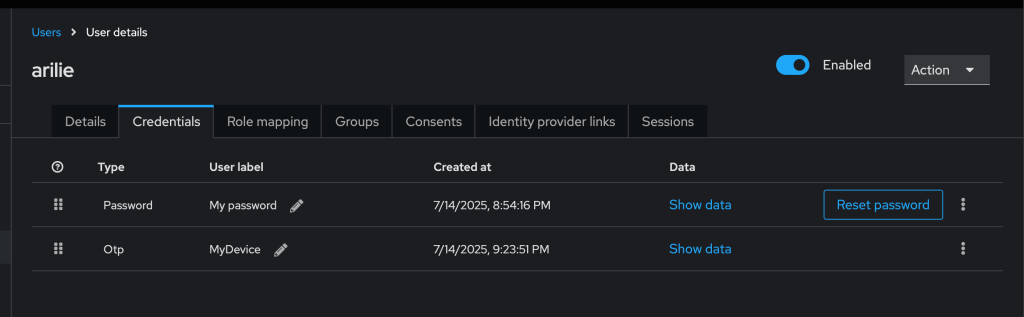
5. Then, after call the register API, we can see in keycloak the OTP already setup.
6. Then, when the user login to their account. Keycloak will need 2FA.

Additional Tutorial
As we can see before, we already configured Keycloak 2FA using REST API QR Code. But there is another API too that may be useful. like Validate OTP, delete OTP, and etc.
The API can be accessed in README through this link: https://github.com/arisusantolie/keycloak-totp-api-provider.
Thanks for reading — I hope it helped!